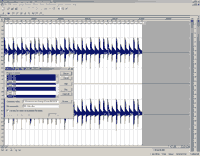
Hook up your computer to a synthesizer (synth’s out to your sound card’s aux/input). Open Sound Forge and start recording. Play all synth sounds one after another (keep pressing “+” or “next” or whatever it is that changes the sound on your synth). The length of each tone is arbitrary, but don’t go crazy, having 30 second samples is just silly.
Most of synthesizer sounds only oscillate over and over again after a certain period of time. Stop the recording and save the file. (It is generally a good idea to keep the source recording).
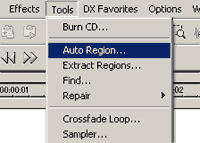
Use auto region tool to divide all the sounds in your recording.
You can select various settings to achieve the best results (these presets are: drum beats, music 1, music 2, slow music and speech phrases, but you can create your own and even save it as a preset for later use).
If recorded signals are too close to each other, leave 0.5 to 1 seconds of silence before you switch to the next sound during your next recording.
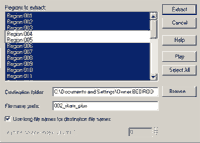
Now use extract region to extract all your divisions and save them as separate sound files. Set the filename format and the saving path (you don’t want these files to extract on your desktop do you?) then select the regions you wish to extract and press extract.
Your samples are now ready for use. Still hot!
Note: Sometimes you will get a bit of pause before each sample. This can be fixed by applying different settings and re-extraction of the main recording (that is if you’ve kept the original recording) or by manual fixing in Sound Forge or some other sound editor (which can be a rather dull task). Generally a bit of pause before the sample won’t hurt as most of modern samplers and software has a sample start option.


